SEO Add-On for Google Sheets
SEO Add-on for Google Sheets™ by WordLift is the extension that allows you to perform semantic keyword research and entity analysis, and create a JSON-LD to help Google understand what your content is about.
With a few simple clicks, you can install the extension, you can analyze the entities behind a search query and the entities behind a web page (whether it’s your page or a competitor’s) and develop a semantic content strategy that determines which entities can enrich your content and beat the competition.
The Entity Analysis supports hundreds of languages with many different alphabets (any language natively supported by WikiData).
In this video you will learn what is SEO Add-On for Google Sheets and how it can help you to improve your SEO strategy.
How it works
1. Installation
To install the SEO Add-on, open the Google Marketplace by clicking on the following link:
https://workspace.google.com/marketplace/app/wordlift/785668802292Then click on the Install button, then the Continue button, and then click on Allow when requested.
2. Create Google Sheets
Once the SEO Add-on is installed, you can create a new Google Sheets™ document by clicking on this link, sheets.new.
When in Google Sheets, open the SEO Add-on by clicking on the Extensions menu, the WordLift, and finally Open: the sidebar will show.
3. Configure Settings
Next step is to configure the SEO Add-on settings, click on the Next button in the sidebar. You'll need a key for the SEO Add-on to work. Normally we prefill the key based on your e-mail address, but if you're using a different e-mail address with Google, you'll need to insert the key yourself.
You can also configure your target geo market, language and the Google domain to use for SERP analysis.
4. Run the Entity Analysis
Start running the Entity analysis is very easy. Once you have set up your SEO add-on, click Entity Analysis and follow the steps: Select up to 5 queries or URLs you want to analyze and run the analysis.
The result includes:
- The list of entities with links to DBpedia or WiKidata,
- The confidence level of each entity (a value from 0 to 1 that takes into account factors such as thematic relevance and contextual ambiguity),
- The ranking of the entities in the SERP (this data is obtained during the analysis of the entities to which a query refers),
- The number of occurrences in the text (i.e., how often the entity appears in the mentioned content).
You can select the most relevant entities, and the SEO Add-on will automatically create the JSON-LD that you need to copy and past into your website.
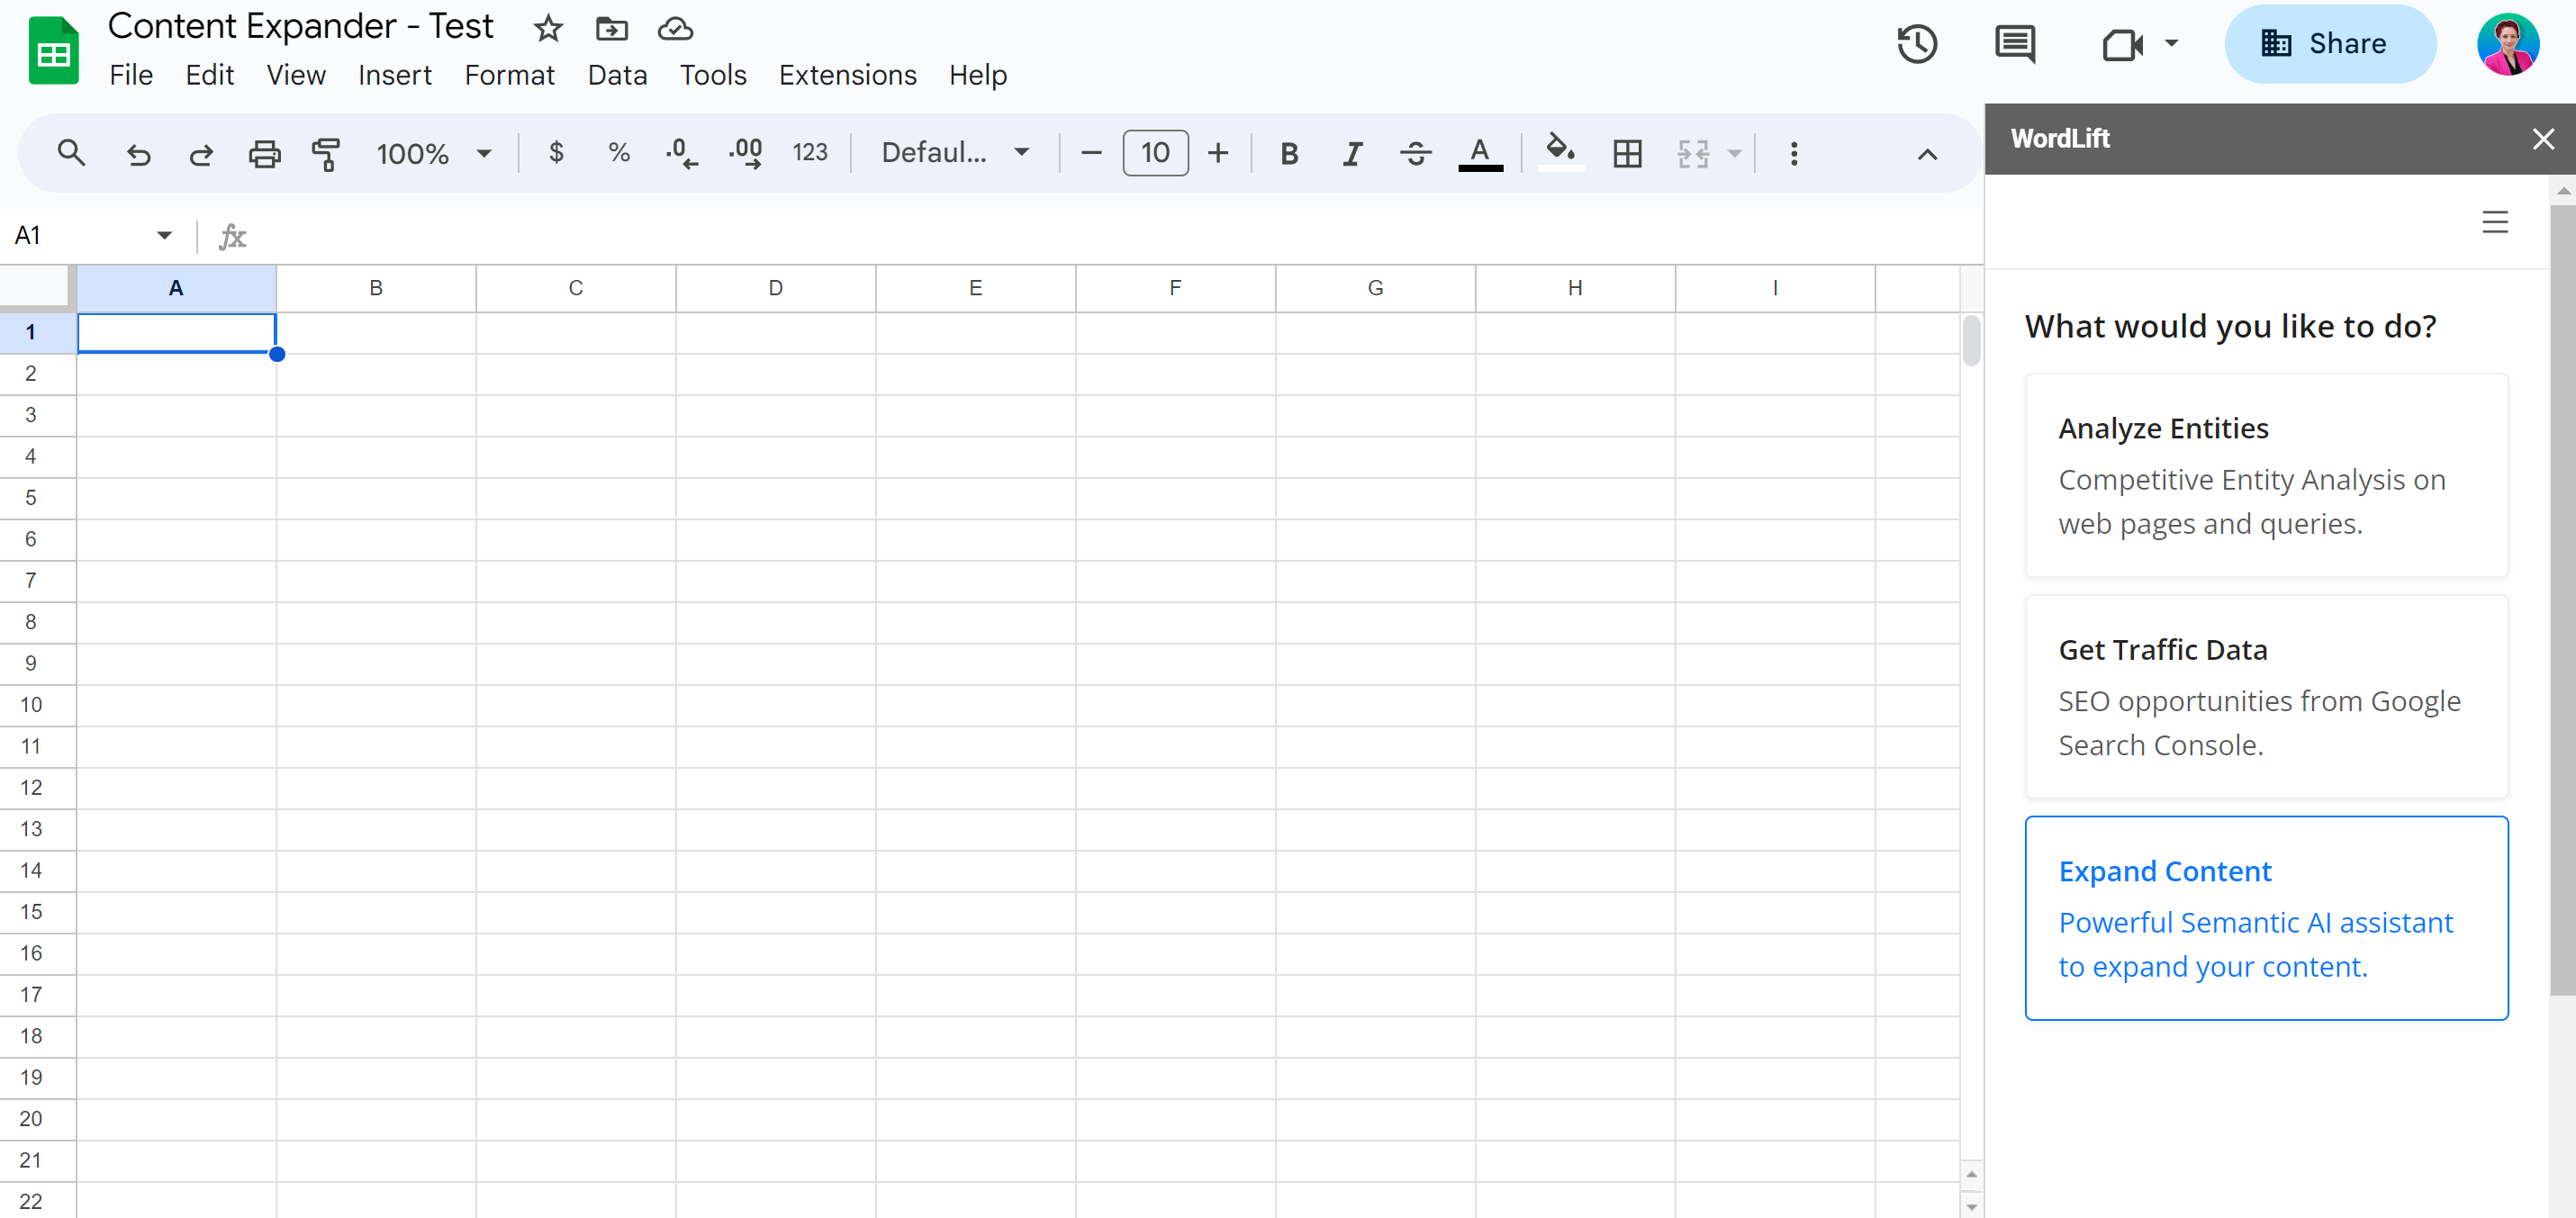
5. Expand Your Content
With the Content Expander, you can enrich your content by integrating relevant entities. Here's how you can make the most of it in just three simple steps.
First, from the main schemata click on "Expand Content." Note that you need an OpenAI key to configure this feature. To find out how to get one, you can visit this link.
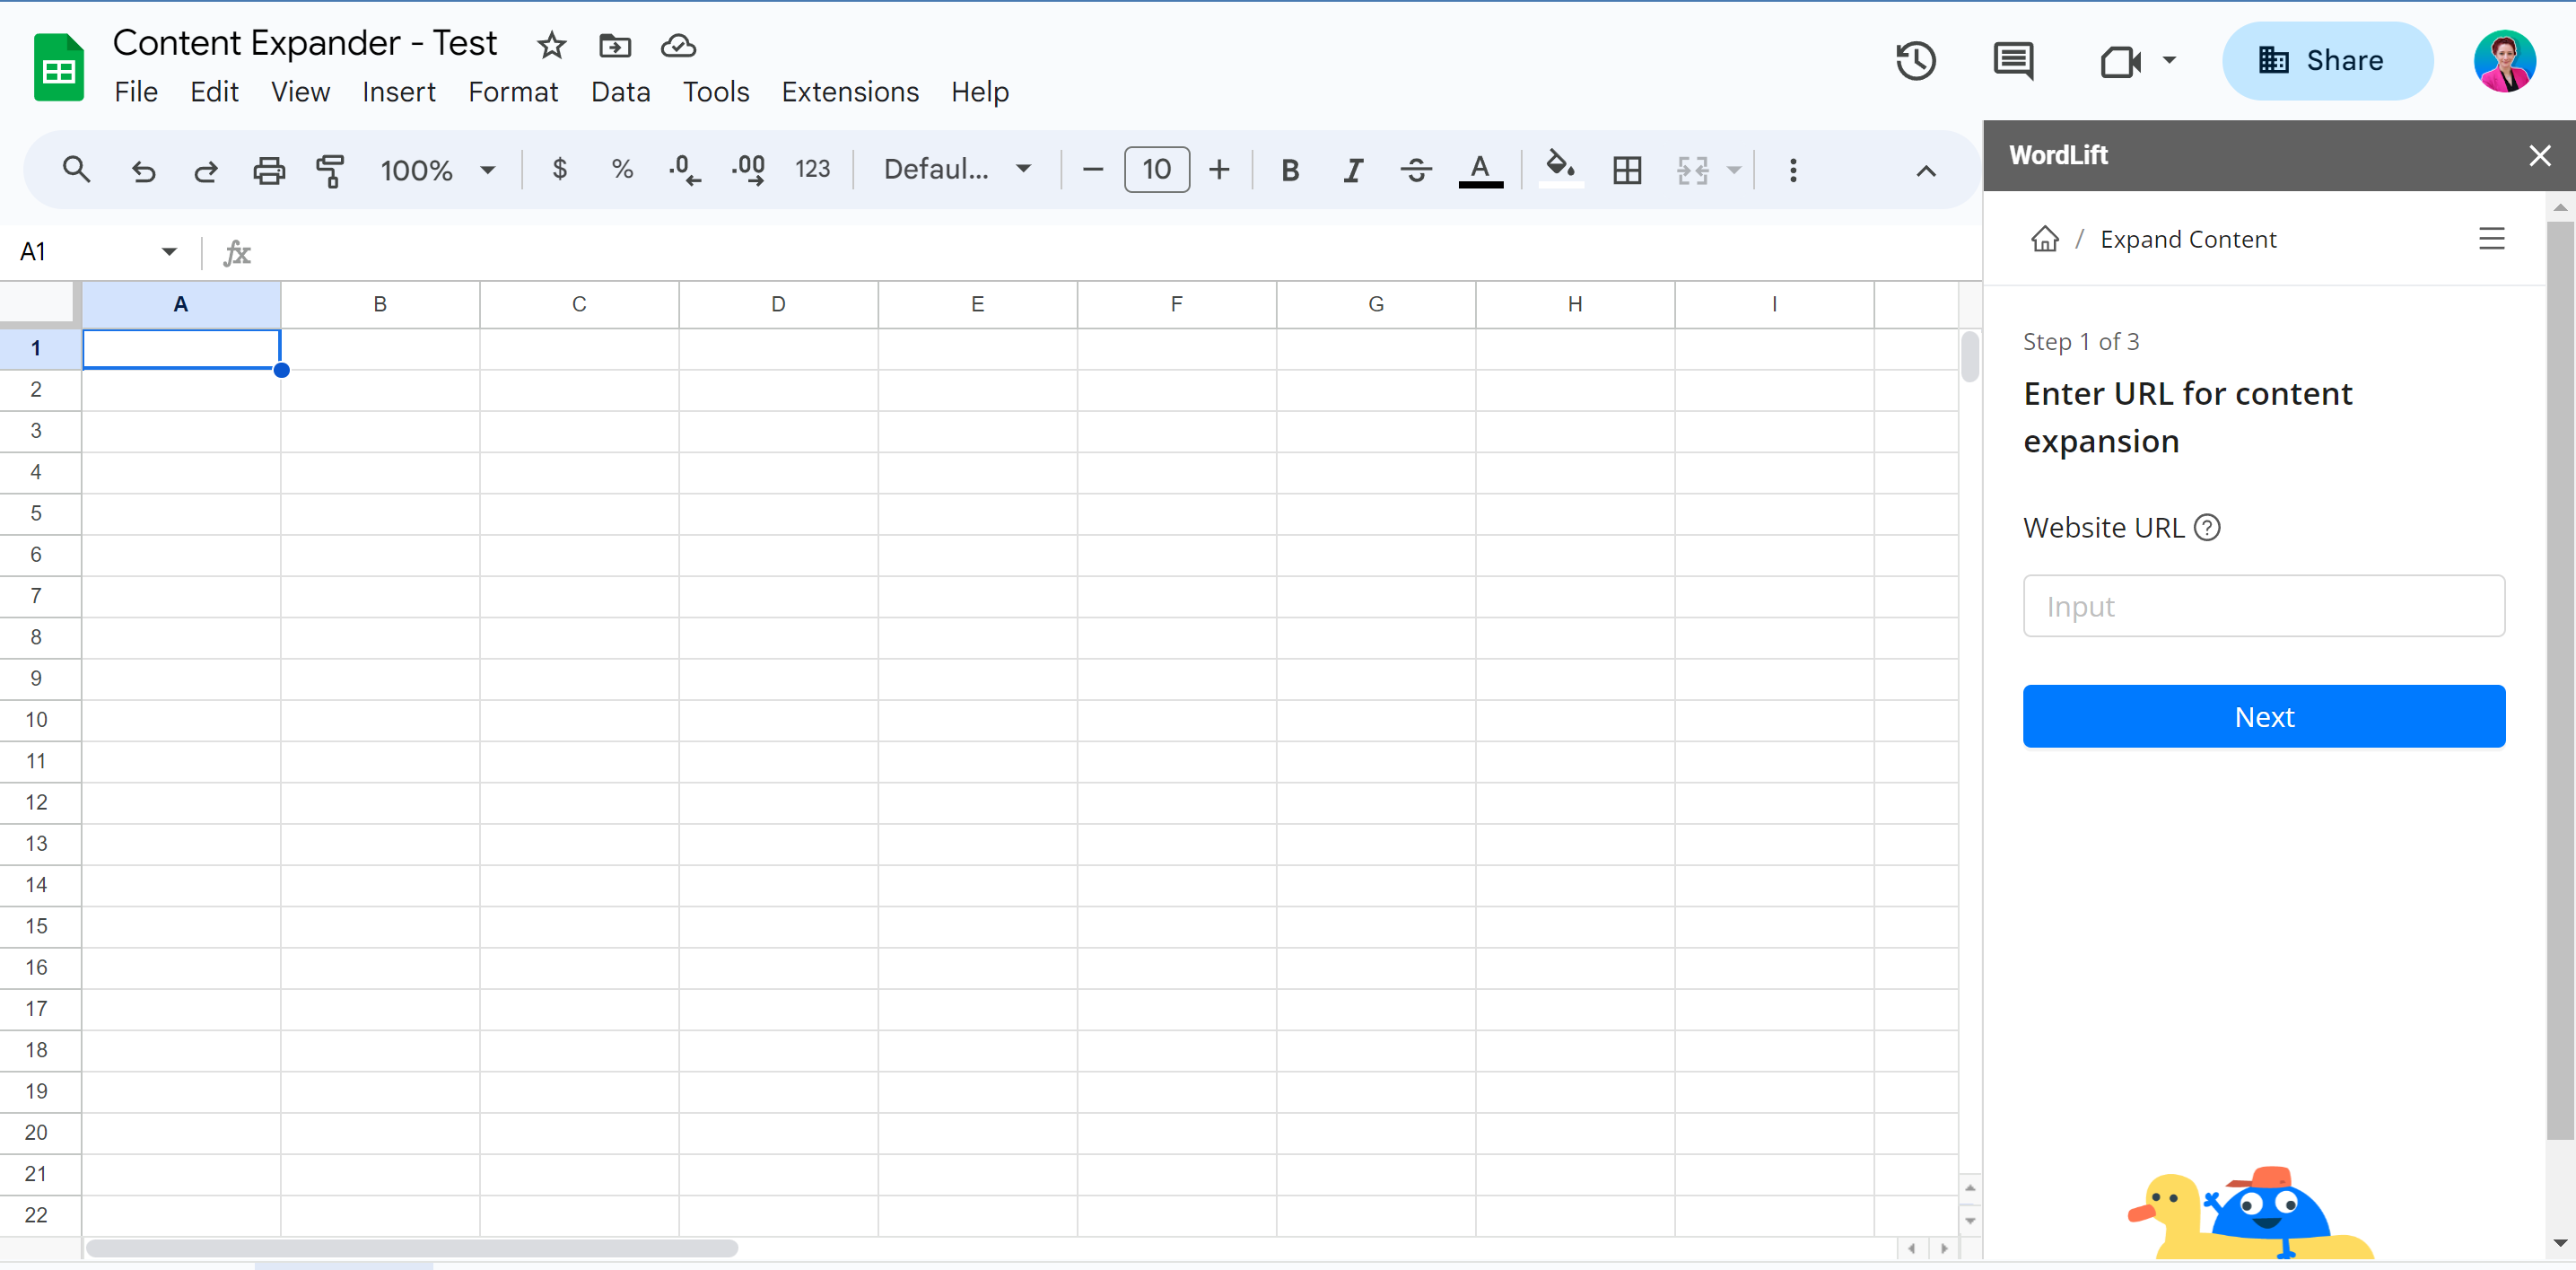
Step 1: Choose a URL
Begin by selecting the URL of the page you're working on. This could be a blog post, article, or any web page that you're looking to enhance. The Content Expander will analyze this page to understand its context and existing content.
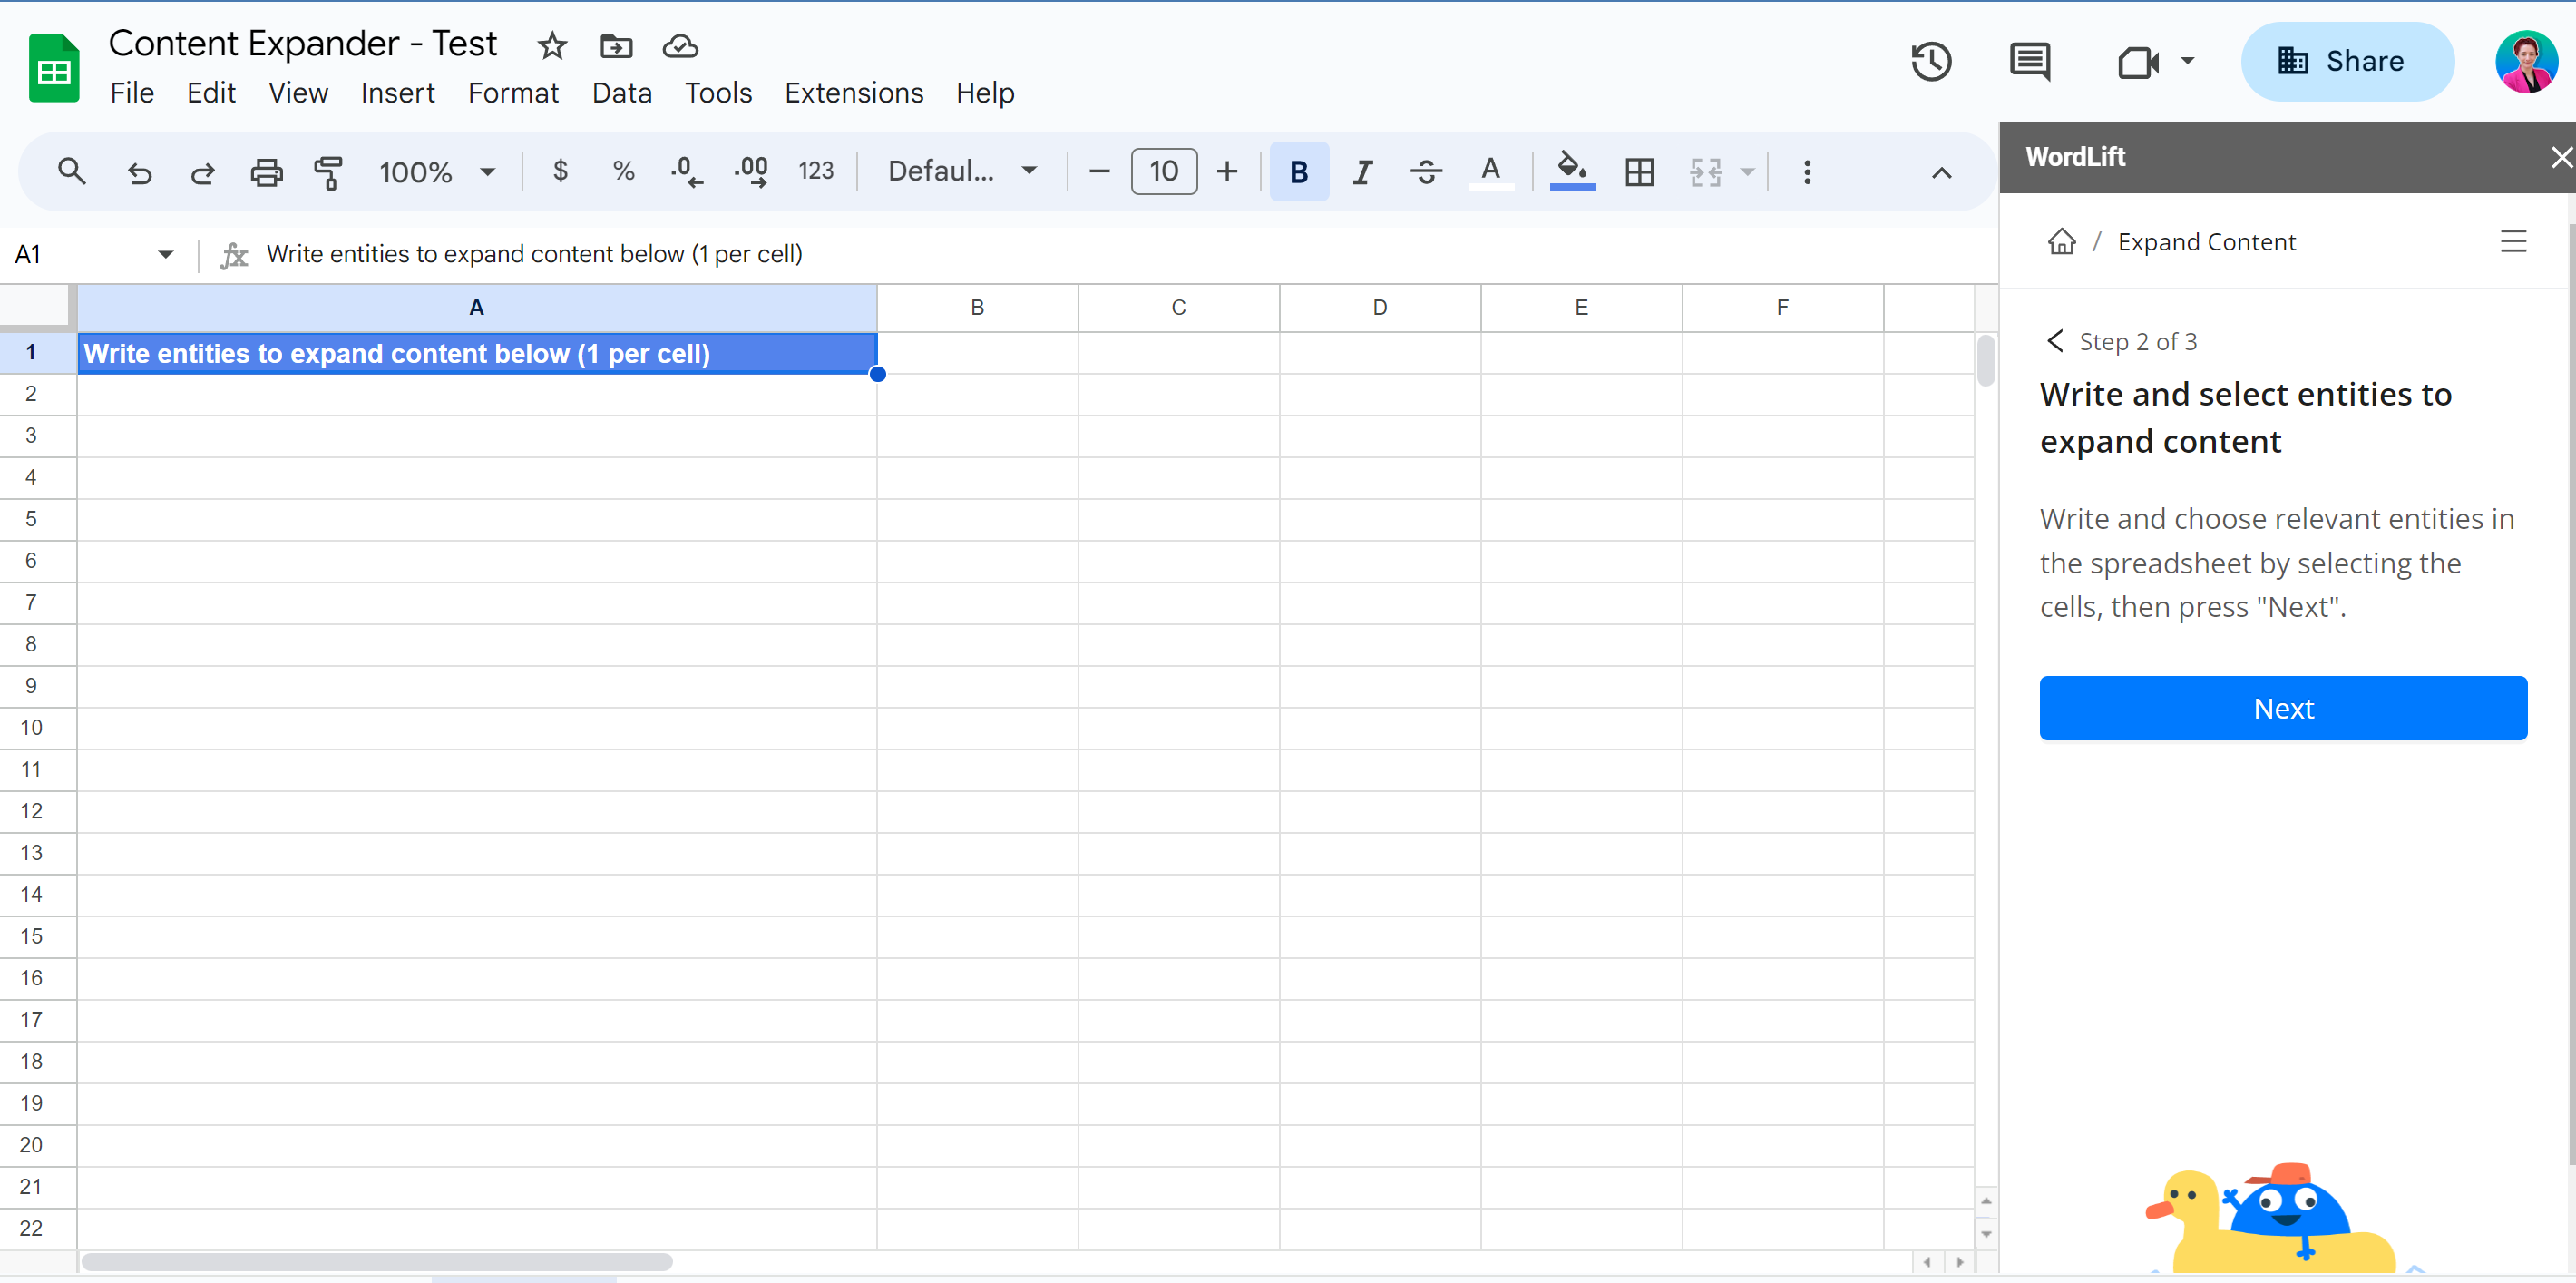
Step 2: Write Entities
Next, compile a list of entities that you want to incorporate into your content. These entities can be essential keywords, concepts, or topics related to your content. This step ensures that the generated content seamlessly integrates with your existing material.
Step 3: Expand the Content
With the URL and entities in place, it's time to let the Content Expander do its job. With a single click, the Add-on will dynamically generate text that weaves these entities into your content, ready to enhance your page's relevance and search engine visibility.
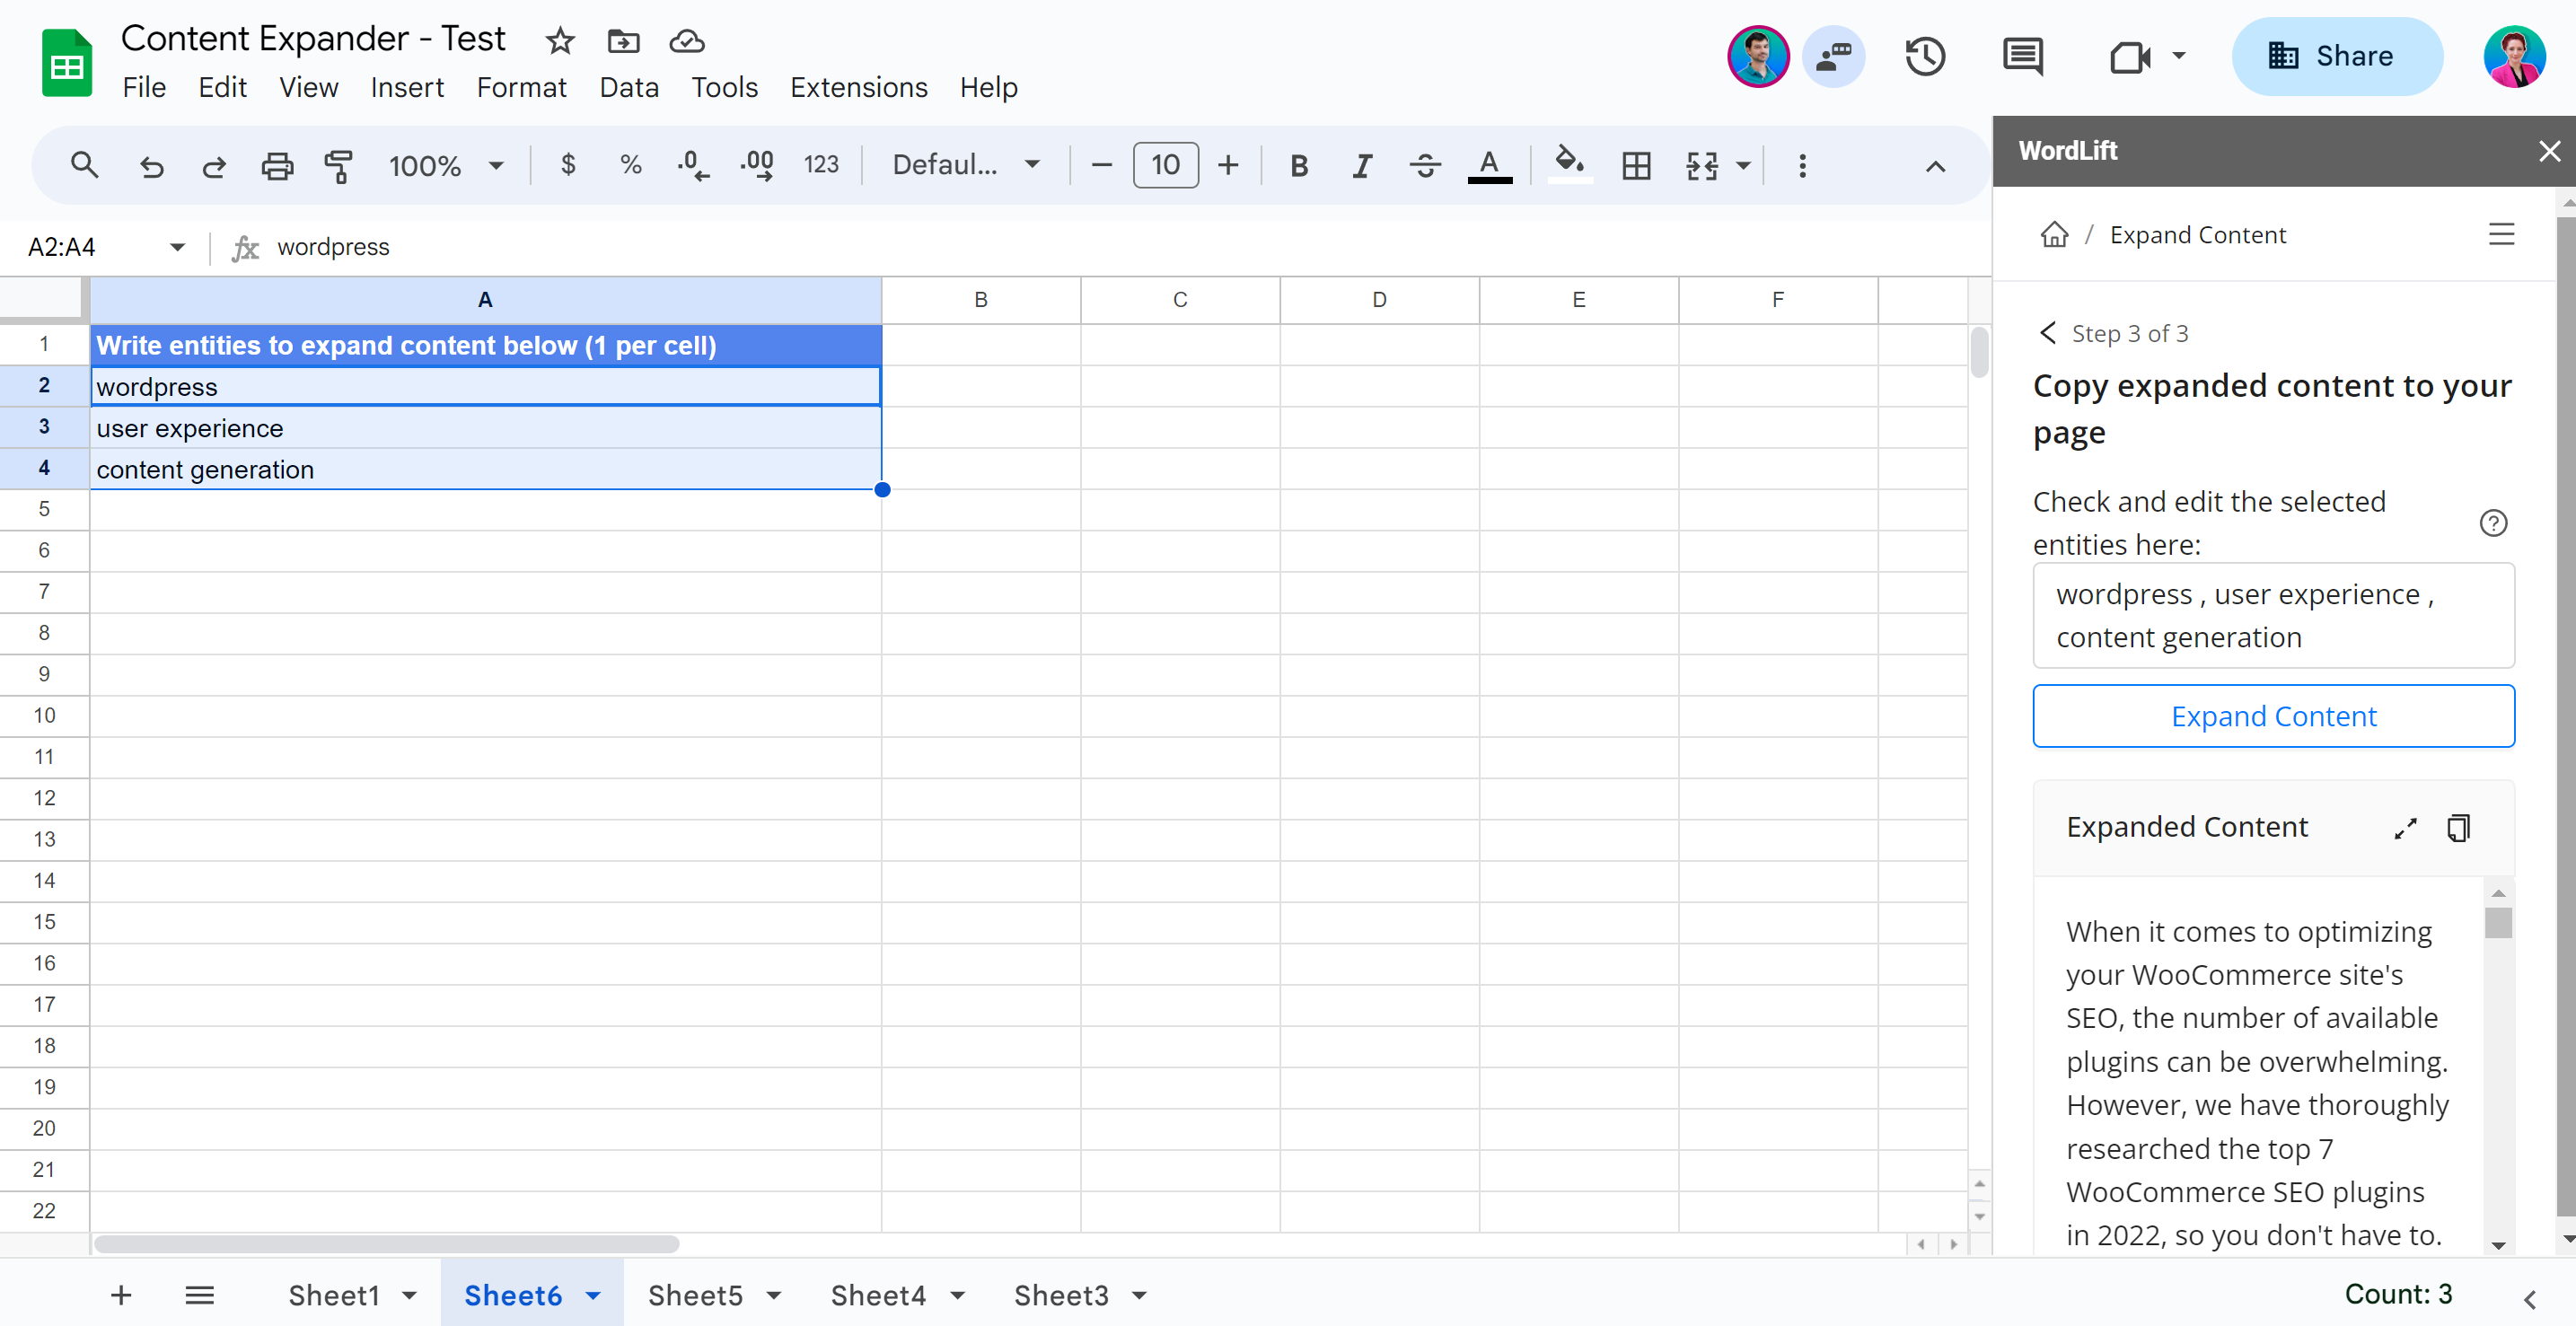
You can expand the window to read the text better. You can decide to add entities or remove them from the list. By clicking on “Expand Content”, you can regenerate the text.
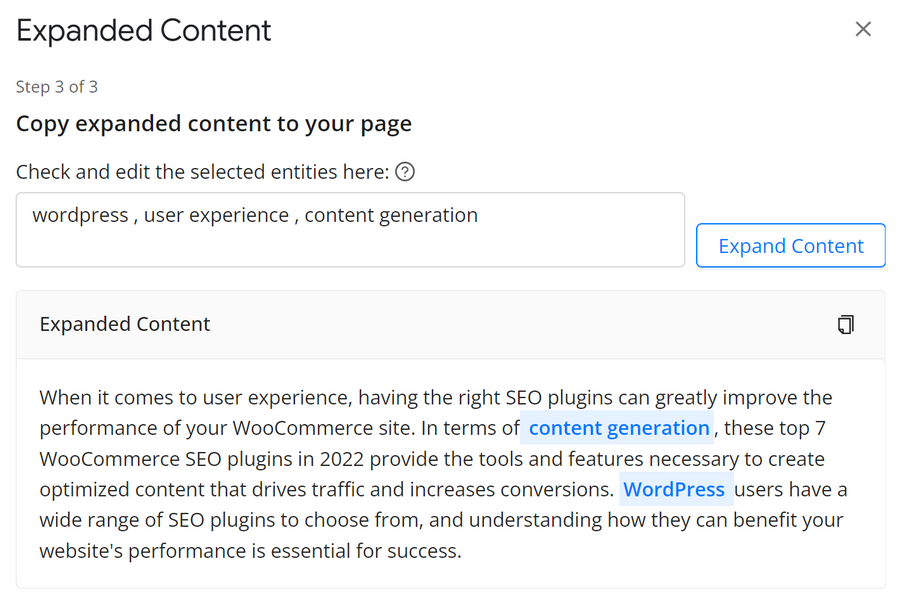
Step 4: Copy and Paste Into Your Page
Once the content is generated, simply copy and paste the content generated directly into your website. It's that easy! You'll immediately notice how the expanded content elevates the depth and relevance of your page.
And there you have it! With just three straightforward steps, you can significantly improve your content's performance on search engines.
6. Get Traffic Data
To know which search queries you should boost, you can connect the SEO add-on to your Google Search Console and sort the analysis based on your traffic data. Here you will also find a column with the Opportunity Score, which suggests which search queries you should target to choose the best ones for your content.
You can now select the relevant entities. If you have WordPress with WordLift plugin we can import the entities straight into your knowledge graph, otherwise you can copy the JSON-LD from the sidebar into your own CMS or web page.
Learn how to use the SEO Add-on for Google Sheets, watching this demo👇
The SEO add-on for Google Sheets™ is included in the Business plan, and only by purchasing this plan you can use the content expander. Alternatively, you can buy the SEO Add-On for Google Sheets from TNW website (in this case, the content expander is not included).
Why is it asking for the country to be added?
This is because Google SERP is different from country to another and the top ranking results can be different. It’s important to understand that local versions of Google results look different depending on where you are searching from.
How can the location affect the analysis?
Google's SERP changes depending on the location. Therefore, it is important to enter it before starting the search: only then will the results of the analysis be reliable for the market and audience your company is interested in.